
A rich AI textarea input is more than a prompt box with a send icon. It is an everything input: one interaction surface where users can write a request, add relevant context, choose an execution option, and see whether their submission is ready, in progress, or complete.
For Vue product teams, the practical route is to begin with a stable multiline field, then add only the context and controls your workflow genuinely needs. We will assemble that surface with DOM Studio’s Textarea Composer, which keeps the text area, actions, and submit behavior in one shared frame while leaving attachments and application logic under your ownership.
Table of contents
- Before you start
- 1. Start with the job, not a larger prompt box
- 2. Establish a dependable multiline core
- 3. Make keyboard behavior predictable
- 4. Add context progressively
- 5. Keep controls purposeful and move durable settings out
- 6. Test the finished everything input in real flows
- FAQ
- Build the smallest useful AI textarea input first
Before you start
You need a Vue application with @getdom/studio/vue available, plus an application-level function that can send a prompt and any selected context to your AI endpoint. Decide these product rules before writing UI code:
- Can users submit an attachment without typed text?
- Does Enter send, or should Enter always insert a new line?
- Which controls are needed for this workflow, such as attachments, a tool picker, model choice, or voice input?
- What should happen while a request is in flight?
Keep the answer narrow. A chat assistant may need attachments and a model picker. A document-review flow may need source files but no voice control. An automation launcher may need a tool selector but should keep advanced parameters outside the composer.
1. Start with the job, not a larger prompt box
Use a basic prompt box when the only task is entering a short request. Move to an everything input when the user must combine the request with context or execution choices in the same moment.
A basic textarea answers one question: “What do you want to say?” An AI textarea input answers a more complete question: “What should the system do, with which context, and under which option?”
The distinction prevents two common mistakes: putting workflow controls in a distant toolbar, or packing every possible setting into the composer. Keep the composer responsible for the immediate submission. Put durable settings, account preferences, and complex configuration elsewhere.

Verification check: describe the submit payload in one sentence. For example: “Send the user’s message, selected receipt, and model choice for reimbursement review.” If that sentence includes context or an execution choice, an everything input is justified.
2. Establish a dependable multiline core
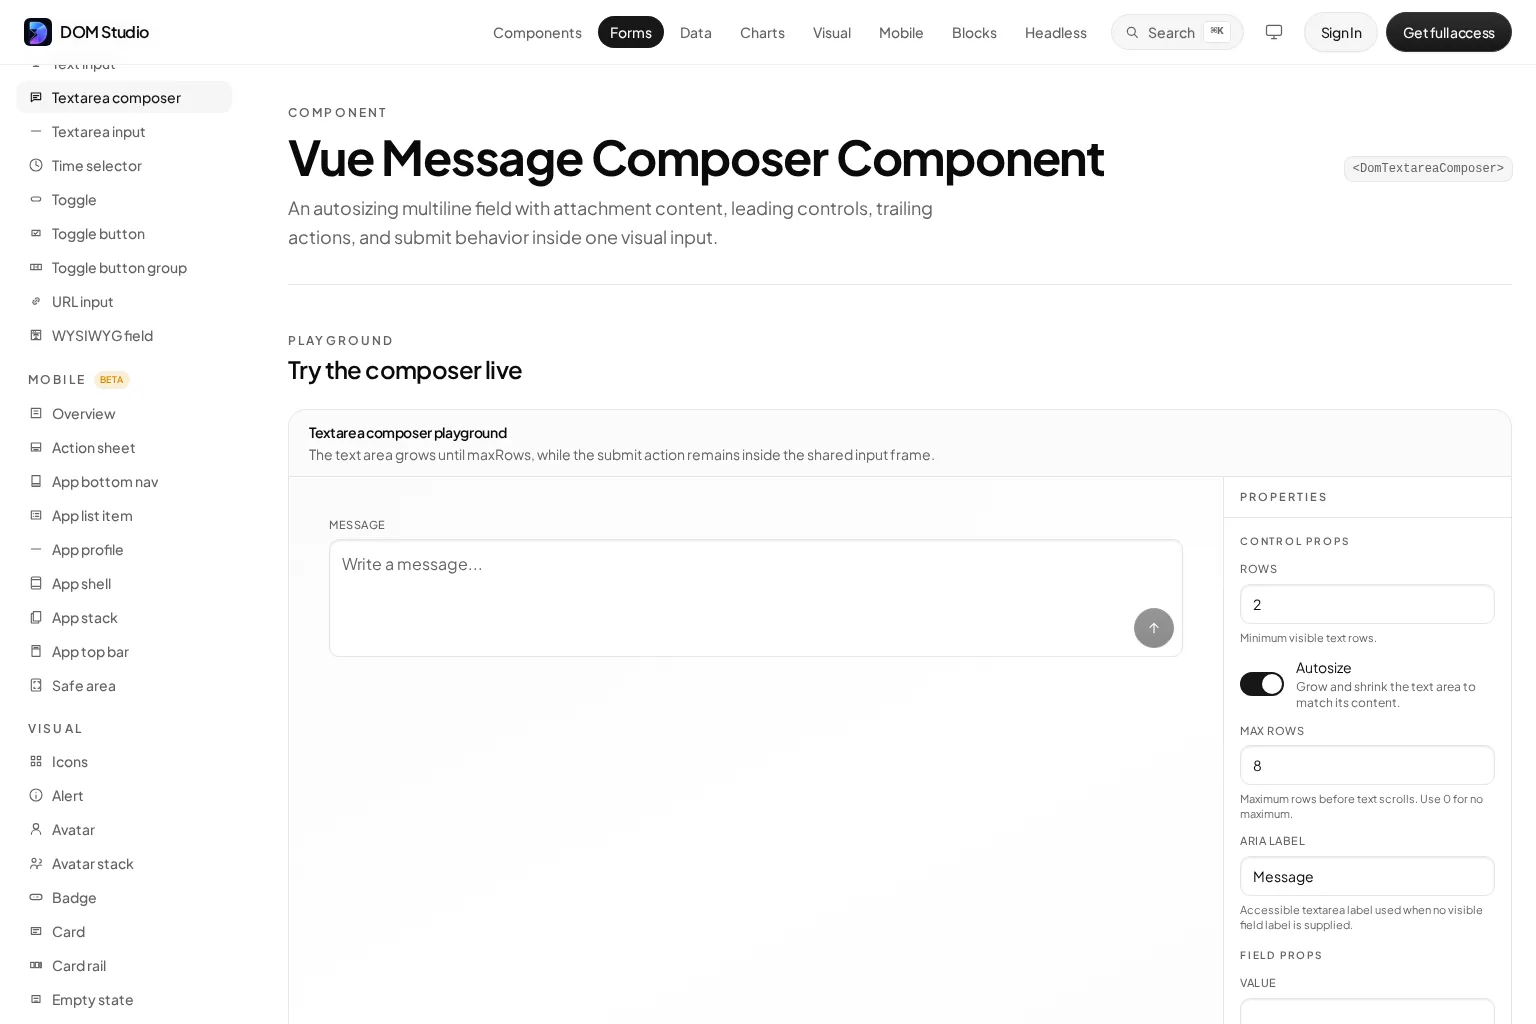
The core must work before attachments and tools exist. Give the field a visible label where possible, a useful placeholder, a bounded autosize behavior, and clear disabled and validation states. DOM Studio’s composer supports rows, autosize, maxRows, ariaLabel, field-state props, and validation wiring.
Start with two visible rows and a maximum of seven or eight rows. That leaves room for a useful draft without allowing a long prompt to take over the conversation view. When the prompt is empty, keep submit unavailable unless your product intentionally supports attachment-only requests.
<script setup>
import { ref } from 'vue';
import { DomTextareaComposer } from '@getdom/studio/vue';

const message = ref('');
const submitting = ref(false);

async function submitPrompt(value) {
  if (!value.trim()) return;

  submitting.value = true;
  try {
    await sendPromptToYourApi({ message: value });
    message.value = '';
  } finally {
    submitting.value = false;
  }
}
</script>

<template>
  <DomTextareaComposer
    v-model="message"
    label="Message"
    placeholder="Ask a question or describe the task..."
    :rows="2"
    :autosize="true"
    :max-rows="8"
    aria-label="Message"
    submit-label="Send message"
    :submitting="submitting"
    :submit-on-enter="true"
    :allow-empty-submit="false"
    @submit="submitPrompt"
  />
</template>
Expected result: the textarea grows with the draft until it reaches maxRows, then scrolls within the input. The submit control stays in the shared frame and blocks repeat sends while submitting is true.
If your use case only needs labeled multiline text with no inline tools or submit affordance, use the lighter Textarea Input instead. It keeps the form-field behavior without adding composer controls.
3. Make keyboard behavior predictable
For a chat-like workflow, set submitOnEnter to true. Enter sends the current request, while Shift+Enter adds a new line. DOM Studio exposes this behavior directly and emits @keydown before its built-in Enter handling, so your app can add a narrowly scoped shortcut when necessary.
Do not create a hidden keyboard rule. Show an accessible submit label such as “Send message,” and keep focus in the textarea after an invalid or blocked attempt. After a successful send, clear the draft only when your application has accepted it. If the API rejects the request, preserve the text and present the error close to the composer.
Verification check: test all four paths with a keyboard only:
- Enter sends a valid non-empty prompt.
- Shift+Enter inserts a line break.
- An empty prompt does not send when
allowEmptySubmitis false. - A second send cannot start while
submittingis true.
4. Add context progressively
Attachments, references, and selected records belong above the text area because they change what the prompt means. They should be visible before users send, removable with an explicit accessible label, and owned by your application state rather than buried inside the component.
DOM Studio’s attachments slot is designed for this. Its composer example uses a receipt preview and asks for a reimbursement-policy review, which is a useful model for a context-first AI task. Keep attachment actions at the leading edge of the bottom row. Reserve the trailing side for controls that affect execution, such as a model choice, voice action, and send button.
<script setup>
import { ref } from 'vue';
import {
  DomButton,
  DomIconButton,
  DomTextareaComposer,
} from '@getdom/studio/vue';

const message = ref('Compare this receipt with the reimbursement policy.');
const attachments = ref([
  { id: 'receipt', name: 'northstar-receipt.png', preview: '/receipt.png' },
]);
const submitting = ref(false);

function removeAttachment(id) {
  attachments.value = attachments.value.filter((file) => file.id !== id);
}

function addAttachment() {
  // Open your application-owned picker, then update attachments.
}

async function submitReview(value) {
  if (!value.trim() && attachments.value.length === 0) return;

  submitting.value = true;
  try {
    await sendPromptToYourApi({
      message: value,
      attachments: attachments.value,
    });
    message.value = '';
    attachments.value = [];
  } finally {
    submitting.value = false;
  }
}
</script>

<template>
  <DomTextareaComposer
    v-model="message"
    label="Review request"
    placeholder="Ask about the attached context..."
    :rows="2"
    :autosize="true"
    :max-rows="7"
    :allow-empty-submit="attachments.length > 0"
    :submitting="submitting"
    @submit="submitReview"
  >
    <template #attachments>
      <article v-for="file in attachments" :key="file.id">
        <span class="attachment-preview" aria-hidden="true"></span>
        <span>{{ file.name }}</span>
        <DomIconButton
          label="Remove attachment"
          size="xs"
          icon="M6 6l12 12M18 6 6 18"
          @click="removeAttachment(file.id)"
        />
      </article>
    </template>

    <template #leading>
      <DomIconButton
        label="Attach context"
        size="sm"
        icon="M12 5v14M5 12h14"
        @click="addAttachment"
      />
      <DomButton size="sm" variant="ghost">Tools</DomButton>
    </template>

    <template #actions>
      <DomButton size="sm" variant="ghost">Fast model</DomButton>
      <DomIconButton
        label="Start voice input"
        size="sm"
        icon="M12 3a3 3 0 0 0-3 3v6a3 3 0 0 0 6 0V6a3 3 0 0 0-3-3Z"
      />
    </template>
  </DomTextareaComposer>
</template>
Expected result: users can inspect and remove context before submit. Your app remains responsible for uploads, attachment IDs, permissions, and the request payload.
5. Keep controls purposeful and move durable settings out
The leading, actions, and submit slots make the composer flexible, but flexibility can create a crowded toolbar. Add a control only if it changes the current request or helps users provide that request.
Good candidates for the composer:
- Add file, image, record, or document context
- Select a model or mode for the current request
- Start voice capture
- Open a short tool menu tied to the current request
- Replace the built-in send action with an application-specific submit control
Better candidates outside the composer:
- Account-level AI preferences
- Advanced temperature or token settings
- Workflow configuration with multiple fields
- Long-lived filters and saved presets
If a model choice must be part of a broader form instead of a transient request action, use a labeled Select Input in the surrounding interface. If users are authoring structured JSON, templates, or code as the task itself, a Code Input may be a better editing surface than a general AI textarea input. For a one-line companion value, such as a task name, use a Text Input.
Troubleshooting: if mobile controls wrap into multiple rows before the input is useful, remove secondary actions first. Do not shrink tap targets merely to keep every option visible.
6. Test the finished everything input in real flows
A component is complete when the interaction is reliable in the workflows it supports. Test a short prompt, a long multi-line prompt, an attachment-only request if allowed, a failed request, and repeated submit attempts.
Use this scenario checklist:
- Chat: write two lines, use Shift+Enter, then send with Enter.
- Document review: attach a file, ask a short question, remove the file, and verify the payload changes.
- Support: submit while the request is loading and confirm another send is blocked.
- Automation: choose a tool or mode, submit, and verify that the selection reaches the request handler.
- Validation: trigger an error and confirm the draft and context remain available for correction.
For a broader Vue chat implementation, this video demonstrates a complete message-and-response flow. Its component choices differ from DOM Studio, but it is useful context for wiring the composer into an application request cycle.
FAQ
Should every AI app use an everything input?
No. Use one when users regularly combine a prompt with relevant context or a per-request choice. A basic textarea is faster to understand when the task is simply writing a message.
Can users send an attachment without text?
Yes, if your product supports a meaningful attachment-only task. Set allowEmptySubmit based on whether application-owned attachments are present, then ensure your handler can process that payload safely.
What should happen when the AI response is loading?
Set submitting while the request is active. This communicates progress and prevents duplicate submissions. Keep the control disabled until the request completes or reaches an error state.
Can we replace the circular submit action?
Yes. Use the submit slot when your workflow needs a custom control, while preserving an accessible label, disabled state, and progress feedback.
Build the smallest useful AI textarea input first
Start with a labeled, autosizing composer and predictable send behavior. Add attachments when context materially improves the request. Add model, voice, or tools only when they alter the current submission. That sequence gives users an everything input that feels capable without becoming a control panel.
Open the Textarea Composer playground to test the props and slots live, then adapt the attachment and submit handlers to your application’s own data model.